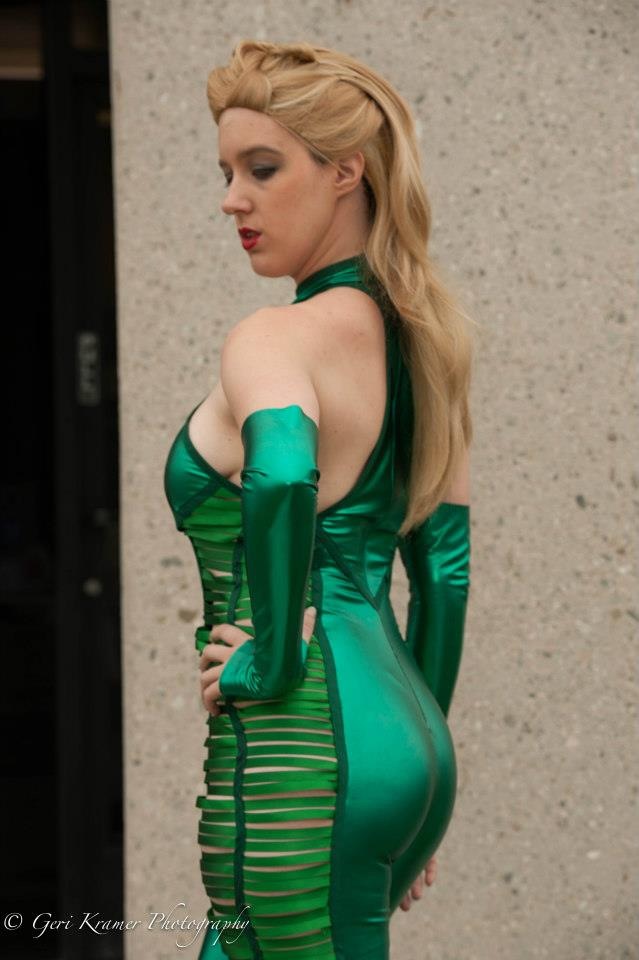
Way back in March of
this year, I debuted a new costume at WonderCon in Anaheim and nobody knew who I
was. That costume was Viper as she would be seen in The Wolverine. Well now
the movie's out and I am happy to report that not only am I still proud of how
my costume holds up, I LOVED the character and the movie.
I highly recommend
you go see The Wolverine and bask in it's ability to make up for the abomination
that was X-Men Origins: Wolverine. For those of you (like myself) who are used
to Viper as Madame Hydra, it might take a second to adjust to the new character,
but I have to admit, for a brand new, original character inspired by an existing
one, they created a fantastic villain. She was deliciously evil, unstoppable
and absolutely fabulous.
Now that the film is
out and the character isn't so much of a mystery anymore, I figured I'd go ahead
and share some of my favorite shots of the costume from recent
cons. Photography credit goes to Jonathon Courtot and Geri Kramer.
The featured
Wolverine is the perfectly perfect in every way Lon Brown (Lonstermash) who is
hands down the best movie Wolverine cosplayer around (IMO) and should be working
as Hugh Jackman's stand-in.
When I started
cosplaying again a few years ago, I had a dream to work with my filmmaker
friends to make short films that represented characters I love the way I've
always wanted to see them. With my Black Widow costume falling apart, I knew it
had to be first. I went to my friend Jon with an idea: what if we made a James
Bond film starring Natasha instead of Bond? Black Widow is a super-spy. She is
the female, comic book equivalent of James Bond and no other representation felt
like it would do her the justice she deserves.
The short takes
place during the period of her career when Natasha is making a name for herself
as a solo super-hero (and keeps bumping into Daredevil). Since she regularly
went up against The Hand during that time, we came up with an idea to bring in
the feel of the classic Bond films where James goes up against a seemingly
big-time villain with some faceless organization backing him. We looked up
leaders of The Hand from over the years and landed on 2 options: Jon as Kingpin
or Shawn as The Mandarin. We weren't completely convinced Shawn could pull off
the look of The Mandarin, but our urge to include him lead us to the phone
conversation featured in the short and the idea that Kingpin has other leaders
looking over his shoulder.
We filmed this short
over 1 weekend and the entire process took approximately 3 months from original
concept to final product. We brought in a fantastic team of friends from
college - Alex for cinematography and color, Jon for editting, Scott for props,
Matt for an original score, Peter and AJ of Random Encounters for a Bond song
for the credits - and I feel incredibly blessed to have been able to work with
such incredible people.
Please enjoy Black
Widow in: High Hit -
My goal was always
do do a video for every cosplay I complete, but production time and schedules
make that hard, so for now, enjoy High Hit and look forward to the fact that
more will come. Hopefully sooner rather than later. ;)
Ladies and gentlemen, I have some exciting news for you. Viper is going to be in The Wolverine due out this summer. What's that? You knew that already? Well did you also know that her costume is stunning and I went through the painstaking process of figuring out what it looked like and putting it all together? No? WELL I DID AND IT'S AMAZING!!!!!!!
I love Viper. She's awesome. And I'm insanely excited for the new Wolverine movie, so as soon as images started leaking, I began collecting materials and I am happy to say it all finally paid off. The night the trailer was released, I started construction. Two days later, I debuted this bad boy at WonderCon with my good friend Lon Brown (who is literally the greatest movie Wolverine cosplayer ever) and you all get to reap the benefits! So, without further ado, I give to you the first ever cosplay of Viper from The Wolverine.
HAIL HYDRA!
There's lots more where that came from, everybody! Feel free to spread this image around and get the hype going for The Wolverine!!!!
This past weekend was PMX (Pacific Media Expo) in Los Angeles and Saturday, Constantine, Steffy, Lon, myself and a few photographers headed to the Old Zoo in Griffith Park for a photo shoot. This is what happened next:
I'll be honest, I never really watched Thundercats til I was older. There was too much guy happening on it for little me to stay interested. But when my friend Constantine approached me with a request to cosplay Thundercats together, there was only one answer: OH MY GOD YES!!!!!!
A few weeks later, we found out about PowerCon/ThunderCon in Torrance, CA and the plan began to form. Constantine had always wanted to cosplay Cheetara and I fell madly in love with Pumyra:
Since a lot of people aren't super familiar with Pumyra, I'll do a "Who Is" post in the near future, but for now, you just need to know she's awesome and her design is fabulous and I love her.
That being said, enjoy the following AMAZING photoshoot from our trip to ThunderCon last weekend. (more to come soon)
I know that's not so big a deal being that I'm a comic book cosplayer, but here's the thing: this will be my first year EVER at Comic-Con. After years and years of yearning, I finally get to go!
I will be at the convention Friday-Sunday. If you want to make sure you see me, send me a comment/email/Tweet and we'll set something up.
Costume Schedule:
Fri: New 52 Catwoman
Sat: Merida
Sun: Black Canary
Hi everybody! I got together with photographer extraordinaire Alex Rothauser a few weeks ago to shoot for my donation rewards and we decided to throw in a little extra - new Black Widow photos! I'm totally in love with all of them. Just sayin.
So by now most of you have seen The Avengers and no doubt loved it as I did, because how could you not?
My only complaint with the film was a moment of Hollywood show-boating in the form of an Iron Man-Thor penis-measuring contest towards the beginning. Seriously? I won't deny it started out entertaining and ended epically, but around the middle I went "wait a second... are we still doing this?" *shakes head*
Aside from that, I was blown away - and I went in with extremely high expectations. The script was exceptional and the performances were spot-on.
I was really impressed with the way they wrote in everyone's appearances so that even someone like my parents who hadn't seen all the previous films could catch on quickly and follow along without hiccup. *GASP* Just like the old comics! That's right! Back in the heyday of comic books, you could pick up any old issue of a series and be able to catch the story and understand the characters while still including nods to the long-time readers to make them feel special.
Which brings me to the surprise at the end - Thanos<<-- SPOILER!!!!!
I've had COUNTLESS people approach me since seeing the film to ask who the heck this random character is and I could not be happier. The inclusion of this cameo was a display of love to die-hard Marvel fanatics like myself and opened the door to a whole slew of newbies who are now passionately interested in finding out more about this character and his story.
I'll try to write a "Who Is" post on this character in the near future, but for now, here's a nice little summary from MTV Geek to tide you over.
*by the way, the second after credits sequence is totally skip-able and I honestly felt a little jipped for having sat through my chance at a bathroom stall to watch it...
As to my experience - seeing the movie at the El Capitan was AMAZING and I highly recommend dropping the extra $$$ to see it there if you can. Stan Lee's collection is inspiring and the atmosphere is incredible - granted I go to a lot of movies there, but this was a grand time and seeing Stan Lee's collection is worth the price of admission alone.
I went with my friends Shawn, Jon and Peter. Shawn and Jon didn't cosplay, but they did wear Avengers-related shirts and Peter dressed as Solid Snake from Random Encounters' The Best We Can Be and he got a TON of attention for it. It was pretty awesome.
I got a lot of attention from "press" and other theater-goers for my Black Widow costume - even though the only people that used my footage was the El Capitan video - thank you again mysterious editor man for using me! I met another cosplayer who had put together an amazing movie Black Widow and looked just like Scarlett Johansson - like freakily so... o.O - and she only beat me out in the costume contest cuz of her sweet martial arts moves... stoopid heels... ><
Seriously, though, she looked amazing and totally deserved to win and the prize was a license plate cover anyway and I don't have a car, so it all worked out! Thank you crazy lady who drove me off the road! Wait...
To make the night even better (seriously? Like it could be!) Clark Gregg - who plays Agent Coulson in the films - surprised us all before the film started and I won't lie - it was pretty awesome
Well. Now that I've wasted half a page rambling about how FREAKING AWESOME THE AVENGERS WAS!!!!!! Here are my photos from the night:
Seriously, though - if you don't know why I went with Solid Snake YOU NEED TO WATCH THE BEST WE CAN BE
me and the Hulk - aka Jon
rockin' our 3D glasses - Peter's being a creeper in the background
So even though Natasha had black hair when she was introduced in 1964, her red hair has become synonymous with her character and no Black Widow cosplay is complete without it.
Naturally the first thing I did when I decided on the costume was order a red wig off eBay:
I loved the color and the shape and was very excited to have found the perfect wig right off the bat!
Until I received the package in the mail and it looked like this:
Pretty much not at all the same color, huh? Or really even the same style...
I wanted to make sure to include this part of the journey to emphasize to all you cosplayers out there how important it is to research your purchases on eBay. Convenient though it may be, descriptions are very rarely accurate.
So I did a little research on dying a synthetic wig and was appalled at how unhelpful all the information out there is. Most people tend to advocate for the Sharpie method, but that seemed way too complicated and expensive for varied results, whereas the acrylic ink route seemed to have positive results when applied correctly, but there was very little information on how the method fared with an already colored wig and there was little to no reference on what to expect during the process.
Finally, I came across an extremely useful blog by funnypeculiar at To The Wig Shop about her experience dying a turquoise wig blue and was reassured. And so I embarked on a magnificent cosplay adventure!
**those of you who would rather watch the video can skip to the end or visit it here
Materials
*metal wig stand - NOT STYROFOAM
*FW (or other preferred brand) acrylic artist ink in desired color
*70% isopropyl rubbing alcohol
*spray bottle of any size/material - the smaller the bottle the more you will have to refill
*plastic hair clips - that you don't mind staining
*hairbrush or comb - that you don't mind staining
*rubber or latex gloves
*plastic trash bag or other material to cover workspace
*well-ventilated area - ideally a garage, driveway or similar space
Why a metal wig stand? Because a styrofoam stand will get stained with the ink and be destroyed when the wet wig sits on it to dry.
Where can you get acrylic ink? Michael's does not carry acrylic ink, so don't waste your time. Most local and chain ART stores carry the inks (note Michael's is a CRAFT store, NOT an ART store) - Blick's, Swain's, etc - or you can find them online
Why should you cover your work space and/or work outside? Because this is what my garage looked like when I finished:
STEP 1: cover anything in your work space you don't want to get stained (counter tops, floors, etc)
STEP 2: set up your wig stand and place your wig on it - use clips to secure the wig to the stand
STEP 3: if working with a long wig, section off the hair into thirds (the right separate from the back separate from the left) so you're able to control what you're hitting with color easier
STEP 4: select with section you'll start with and release the lowest seam of the section, keeping the rest up (I forgot to take a photo of this, but you can see it in effect in my video below)
STEP 5: mix your color:
3/4 cup alcohol
6-7 full squeezes of ink
(recommended ratio: 8 full squeezes of color for every 1 cup of alcohol)
*I mixed two colors together for mine and had a small spray bottle, so my measurements were more like this:
3/4 mass of spray bottle of alcohol
6-7 full squeezes of base color
2+ full squeezes of shade color
(I had to refill about 4+ times)
*I recommend doing a strand test on a small section of hair at the underside of the wig to figure out your ideal color mixture
*WIGS CAN NOT STAND MUCH MORE THAN 2 DYES, so if you need to strand test more than that, I'd recommend pulling out a new strand to test or that section will start to fray
STEP 6: spray color onto thin section you left down
STEP 7: brush or comb (brush is least testy) through that section (starting at bottom of strand and working up to avoid tangles) to ensure every strand is saturated
STEP 8: let down the next seam above the section you just sprayed and re-secure the rest of that section
STEP 9: repeat steps 6-8 until wig is completely covered, repeating step 5 as needed (I left a few random layers the original color to create texture in the wig and loved the results, so that is an option and can work beautifully)
wig with color fully applied
STEP 10: make sure each section is fully brushed through and saturated then let sit for a MINIMUM OF 2 HOURS, MAXIMUM OF 8 - if the color stays on too long it can start to deteriorate the wig, stick, stiffen, or any number of other horrible things you don't want
STEP 11: rinse
*you can use a small dollop of shampoo, but you don't need it
*make sure you really work the wig strands to get all the ink out and the water is running clear
*MAKE SURE YOUR SINK IS CLEAN - you don't want toothpaste getting stuck on your wig and eating away the color you just applied
STEP 12: let wig dry
STEP 13: once the wig is dry, run a brush over it
TADAH!!!! And you've got yourself a brand new wig!
Before and after comparisons:
And finally, for those of you preferring video instructions:
If you have any questions, feel free to direct them here, on YouTube or @AngiViper
Next we move on to one of Black Widow's most iconic costume pieces; her gauntlets:
In the comics, Black Widow's gauntlets house her rope so she can swing around like Spidey and power her Widow's Bite (an electrical charge used to incapacitate enemies) and have been a Black Widow costume staple since their introduction in 1965.
Similar to the belt, I started with AMACO red terracotta clay, wax paper, fishing line, a small screw and a thick screw.
I covered my work space with wax paper and cut slices of clay with the fishing line. I rolled each piece into a "snake" about 4 1/2 inches long and 3/4 inch thick. I rounded the ends and smoothed each out with water and then drew lines around the form with the small screw; one about 2 inches from the end and one about 3/8 inch away from one end, then I poked two holes with the large screw about an inch away from either side (I swirled the screw around a bit to make sure the holes were well formed since the clay shrinks a bit when it dries).
Then they just needed three coats of FolkArt #660 "Metallic Pure Gold" and thin elastic strung between them and they were done:
In retrospect, I would probably have liked to use something a bit lighter since each gauntlet weighed about 3 pounds and I would definitely spray them with the gloss like I did the belt because the paint got weak in the heat and pieces started to stick together and the paint is currently peeling, but only 2 cylinders broke:
Phew! Backlog! Ok. So. Black Widow. We'll start with the belt:
So Black Widow's uniform has gone through many forms over the years, and her belt is no exception. For this outing, I decided to go with the gold belt so it really stood out in the darkness of the midnight show.
I started with wax paper to cover my work space, AMACO red terracotta clay (from Michael's), fishing line and a small screw:
Terracotta clay is pretty stiff and a pain in the butt to pull pieces off of, so I used the fishing line to "cut" slices of clay off the brick that it comes in.
I started out using a circle on my wax paper as a template for each medallion:
but that quickly deteriorated as the wax paper broke down and ripped, so I made a circle of cardboard and used that as a template from then on.
I made sure that one side of each medallion was flat and the other was rounded and used water to smooth the surfaces. Once each was done, I peeled it off the cardboard and poked a hole in either side with the small screw, making sure not to rip the piece and molding it back together with water if I did.
At that point, they just needed to sit and dry overnight and they came out beautifully:
I painted all but 2 (for safety) with about 3 layers of FolkArt #660 "Metallic Pure Gold" from Michael's.
The last 2 I painted with 3 layers of Craft Smart "Holiday Red" also from Michael's, drew the outline of the Black Widow symbol just outside of the size I wanted it (LIGHTLY in pencil) and traced it with the FolkArt gold, then painted the outside of the shape with 2-3 layers of gold:
When all the pieces were painted and dry, I sprayed them all down with a few layers of gloss spray (sprayed intensely close to make them extra shiny) and let them dry outside for a bit.
Once that was all done, I connected all the pieces with small gold jewelry rings (found in the Michael's jewelry section) with the logo piece in the middle and a small gold clasp in the back:
this is the only photo I have of the belt before what happened next...
Isn't it beautiful? I tried it on when I finished and walked around a bit to make sure it was sturdy enough to withstand a bit of pressure and was pleasantly surprised.
The following is a dramatic retelling of what happened the night of the premiere:
only slightly exaggerated
Yup. It shattered. Fell right off my hips as I took the first step downstairs and crashed to the ground.
And so, with moments to go before we were technically late leaving, I super glued the pieces that weren't too shattered to a piece of elastic that didn't quite fit around my waist, duct taped the medallions to the elastic to ensure their security and sewed a strip of thinner elastic to the ends of the wide elastic so the piece would fit and cried my way out the door.
It doesn't look quite so terrible as I think it does with the whole get-up and the guys tell me you can't tell. But I know... I know...
BUT I did learn my lesson and next time I will be crafting the belt around an elastic base rather than relying on it holding up of it's own accord, or building stronger, thicker pieces that won't crumble at the first sign of real stress.
Hopefully my suffering will lead to smart decisions on your parts...