
Naturally the first thing I did when I decided on the costume was order a red wig off eBay:

I loved the color and the shape and was very excited to have found the perfect wig right off the bat!
Until I received the package in the mail and it looked like this:


Pretty much not at all the same color, huh? Or really even the same style...
I wanted to make sure to include this part of the journey to emphasize to all you cosplayers out there how important it is to research your purchases on eBay. Convenient though it may be, descriptions are very rarely accurate.
So I did a little research on dying a synthetic wig and was appalled at how unhelpful all the information out there is. Most people tend to advocate for the Sharpie method, but that seemed way too complicated and expensive for varied results, whereas the acrylic ink route seemed to have positive results when applied correctly, but there was very little information on how the method fared with an already colored wig and there was little to no reference on what to expect during the process.
Finally, I came across an extremely useful blog by funnypeculiar at To The Wig Shop about her experience dying a turquoise wig blue and was reassured. And so I embarked on a magnificent cosplay adventure!
**those of you who would rather watch the video can skip to the end or visit it here
Materials
*metal wig stand - NOT STYROFOAM
*FW (or other preferred brand) acrylic artist ink in desired color
*70% isopropyl rubbing alcohol
*spray bottle of any size/material - the smaller the bottle the more you will have to refill
*plastic hair clips - that you don't mind staining
*hairbrush or comb - that you don't mind staining
*rubber or latex gloves
*plastic trash bag or other material to cover workspace
*well-ventilated area - ideally a garage, driveway or similar space

Why a metal wig stand? Because a styrofoam stand will get stained with the ink and be destroyed when the wet wig sits on it to dry.
Where can you get acrylic ink? Michael's does not carry acrylic ink, so don't waste your time. Most local and chain ART stores carry the inks (note Michael's is a CRAFT store, NOT an ART store) - Blick's, Swain's, etc - or you can find them online
Why should you cover your work space and/or work outside? Because this is what my garage looked like when I finished:

STEP 1: cover anything in your work space you don't want to get stained (counter tops, floors, etc)
STEP 2: set up your wig stand and place your wig on it - use clips to secure the wig to the stand
STEP 3: if working with a long wig, section off the hair into thirds (the right separate from the back separate from the left) so you're able to control what you're hitting with color easier
STEP 4: select with section you'll start with and release the lowest seam of the section, keeping the rest up (I forgot to take a photo of this, but you can see it in effect in my video below)
STEP 5: mix your color:
3/4 cup alcohol
6-7 full squeezes of ink
(recommended ratio: 8 full squeezes of color for every 1 cup of alcohol)
*I mixed two colors together for mine and had a small spray bottle, so my measurements were more like this:
3/4 mass of spray bottle of alcohol
6-7 full squeezes of base color
2+ full squeezes of shade color
(I had to refill about 4+ times)
*I recommend doing a strand test on a small section of hair at the underside of the wig to figure out your ideal color mixture
*WIGS CAN NOT STAND MUCH MORE THAN 2 DYES, so if you need to strand test more than that, I'd recommend pulling out a new strand to test or that section will start to fray
STEP 6: spray color onto thin section you left down
STEP 7: brush or comb (brush is least testy) through that section (starting at bottom of strand and working up to avoid tangles) to ensure every strand is saturated
STEP 8: let down the next seam above the section you just sprayed and re-secure the rest of that section
STEP 9: repeat steps 6-8 until wig is completely covered, repeating step 5 as needed (I left a few random layers the original color to create texture in the wig and loved the results, so that is an option and can work beautifully)
 |
| wig with color fully applied |
STEP 10: make sure each section is fully brushed through and saturated then let sit for a MINIMUM OF 2 HOURS, MAXIMUM OF 8 - if the color stays on too long it can start to deteriorate the wig, stick, stiffen, or any number of other horrible things you don't want
STEP 11: rinse
*you can use a small dollop of shampoo, but you don't need it
*make sure you really work the wig strands to get all the ink out and the water is running clear
*MAKE SURE YOUR SINK IS CLEAN - you don't want toothpaste getting stuck on your wig and eating away the color you just applied
STEP 12: let wig dry
STEP 13: once the wig is dry, run a brush over it


TADAH!!!! And you've got yourself a brand new wig!
Before and after comparisons:


And finally, for those of you preferring video instructions:
If you have any questions, feel free to direct them here, on YouTube or @AngiViper
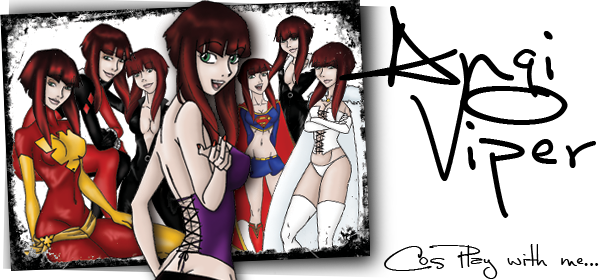
CosPlay with me
-Angi
Will any other acrylic ink work just as good as the FW?
ReplyDeleteI'm so sorry it took me forever to respond!!!! Any acrylic ink will work just fine. FW is just a brand of acrylic ink that I use. :)
DeleteHowdy! Will the wig bleed or rub off on a white shirt?
ReplyDeleteIf you make sure the water runs clear at the end of the process, no. I have had no issues at all with rub-off from this wig.
DeleteGreat vid kid! Appreciate ur detail! I'm going to work up a funky neon red but I was wondering if I could get away with small sections of neon blue....like maybe & do two separate applications? I'm wondering if the blue would bleed off onto the first process when wet? Maybe I should try foiling or Saran wrap the blue process?
ReplyDeleteIt's probably easier to use clip-in extensions but I really don't want anymore weight than I have to since I will be spending long hours & warm weather....
Just a FYI for what its worth...... I'm going for a country girl/hillbilly look....wire pigtails and all. Thx for ur response...I've never worked with ink or synthetic hair before...really like the idea tho'!
Oh that sounds cute! I don't know that you'll be able to get blue over the red, but if you started with a white wig or red with white highlights or something you should be fine. If you're able to cover the red sections (I assume a plastic bag or saran wrap or foil or whatever should work) and spray from a slight distance, there isn't really that much run-off or bleeding. There might be a little at the roots, but that should be easily hidden. Synthetic hair isn't absorbant so it's not like it'll pick up liquids and spread. I would definitely do them as two completely separate processes - dye the red, rinse, dry then do the blue (or the other way around). Hope that helps!
Deletehow do i make my dark brown wig a dark purple?
ReplyDeleteDepending on how dark the original wig is, you may get a purple tint but I doubt you'd be able to get it purple purple. I'd go for the brightest purple ink you can, but at that point it might be easier to just grab a cheap China wig off eBay.
DeleteThank you so much, exactly what I was looking for and hoping it is as successful as yours!
ReplyDeleteI'm glad it helped you!
DeleteI have a long gray wig that i wanted to use for a Princess Celestia cosplay. I was hoping since is was a light gray the bright colors would come out very pastel-y. Do you think it would work???
ReplyDeleteI would definitely do a strand test first. And probably start with the colors a bit more watered down and work your way up adding more ink until you get the desired effect. I would assume it would work and I'd love to see your results.
DeleteDo you think that this method would work for a Vocaloid Merli wig? (picture: http://images4.wikia.nocookie.net/__cb20120727040918/vocaloid/images/6/61/Meruri.png )
ReplyDeleteI was kind of thinking I could possibly get a blue wig and dye most of it a really dark purple and sort of taper the amount of dye the farther down I go and leave the tips blue if that makes any sense?
any help would be greatly appreciated ^^'
Hi I saw your video, and it seems easy to follow. If I only use the second shade would my red be darker? I also bought my wig on eBay, it's about the same color as yours.
ReplyDelete