I made this cosplay in high school with a lot of help from my mom for ICON (Island Convention) - an anime/manga/scifi/fantasy/everything nerdy convention held annually at SUNY Stony Brook on Long Island. A large part of it were items we found and altered to fit the outfit and I must admit, I'm still pretty pleased with the outcome.
Some day I'll re-do it to fix the few inaccuracies we didn't have the time or know-how to do right the first time, but that's a day when I can afford a wig and Tiny Bees:
 |
| Oh, the things I'll buy when I have money... |
Anyway... Perhaps on that day, I'll also post current photos of the costume on me. For now, you get my dress form and old photos from high school. Enjoy.

I guess I'll start from the top and work my way down.
The earring:

At the time, I was very inexperienced and knew pretty much nothing about bead-making. Honestly, I still pretty much know nothing. But, I knew an authentic costume needed some attempt at Yuna's iconic beaded earring. So I dug through my mom's old bags of feathers and beads and found 2 fluffy blue feathers and beads that were close enough in color to Yuna's that I felt content.
I cut a string of thin black rope and strung the beads on. At the very bottom, I tied a small knot around the feathers and pulled out the hot glue gun. I shimmied the lowest bead over the knot and hot glued the whole clump together (bead, feathers and knot) and tied the other end to a hair clip I clipped in behind my right ear.
The hood:

I'm pretty sure all we did for the hood was trace the hood of a hoodie that fit well and sewed the two pieces together. We made sure it overlapped a little so we could put a small square of Velcro in the front and we sewed a string of elastic along the bottom edge so it would fit a little better. The fabric is just a thin pink cotton we found at Joann's.
The "tail":

This was probably the most fun part of the whole costume to figure out and subsequently make. First, we bought a pair of THICK small stockings and cut both legs off at the thigh and toe. We lined up the two legs so they extended the right length, lining them up at the base of the skull with a few inches leeway and extending to about the ankles. Then we took an old black wig and chopped off a handful about a foot in length. We tied one end of the stocking around the hair and hot glued it secure.
Then we proceeded to loosely stuff the stocking tube with cotton/batting from the fabric store until it was the proper thickness all the way down. We wrapped the whole thing with thick, wide red ribbon on a diagonal, dotting hot glue every few wraps to ensure that the ribbon didn't fall off and again leaving a few inches of loose stocking at the top.
Once the whole thing was wrapped and the ribbon securely glued at the top and bottom, we wrapped a piece of black fabric around the bottom end (we didn't have the capabilities to die white fabric pink on one end, so we settled), hot gluing one edge to the seam where the hair and stocking were secured and wrapping tightly a few times around. We dotted some glue in the center of the final edge for safety and wrapped a piece of thin black rope around the fabric and tied a bow.
On the other end of the piece (where we left those few inches of stocking), we folded the stocking over a stretch of THIN black rope long enough to wrap around my head twice and sewed it closed:

When the time came to wear the costume, I separated my hair going from about a quarter of the way back from my hairline down to the base of my skull. I tied the rope around that separation line and turned the rope so the bow/knot was in the back and laid my hair over the rope. I stuck a few hair pins over the rope to make sure it stayed, but no one knew I had a rope running over my head! I also made sure to wear my hood OVER the hair rope since that's how Yuna wears it and it hid any unpleasant details that may have been visable at the top of the piece.
The armbands and bracelet:
These unfortunately got a bit destroyed, which is a pity. Luckily they were the easiest thing to make, so I can still break it down.
The bracelet was simply a piece of black ribbon long enough to wrap my wrist about 1 1/2 - 2 times that secured with a small piece of black Velcro.
The armbands were pieces of gold felt about 3 inches in final height and wide enough to wrap around my upper arms with about an inch of space for cord. When we cut the felt, we left about half an inch on the width so we could fold over a quarter inch on either side and sew it secure with black thread. For the open end, we simply poked holes along either side and thread thin black rope through like a corset, tying the ends in a small bow.

The top:

The top started with a store-bought white tube top. We brought up the bottom so it sat under the bust and stitched it lightly in place. We couldn't find pink lace that we were happy with (or figure out how to line up the lace so it sat under the white but still left the white to flow freely), so we lined white lace up under my bust and layered it over a piece of pink fabric from the hood long enough to stretch from my bust to my hips over which we laid a piece of pink-tinted lacy fabric that stretched just a bit longer than the pink and cut little triangles at the bottom to look like lace. We sewed all three pieces together (lace, pink and sheer) and attached Velcro at the back so it wrapped around and secured in the back:

Then we added squares of Velcro under the tube top and at the top of the lace piece so the top all secured together. In retrospect, I should've taken a photo of that... Oh well.
The belt is a piece of gold rope that wraps around the waist and ties in the back.
The Zanarkand Abes logo I cut from a piece of black felt from the craft store that's felt on one side and "glue" on the other, so you cut out the shape you want and then peel the paper off and stick it to whatever - in this case a white tube top:

Finally, we hand-stitched two pieces of thin white ribbon to the top of the tube top that reached around my neck and tied in the back.
The pouch:

The belt is a rope belt my mom happened to have from like the 70s that was the perfect color and look.

The pouch started with a cardboard box that we cut apart and glued back together in the size we needed. We covered the whole thing with tan felt, extending the top piece to form a flap in the front. On the back, we added a small strip of felt, gluing only the top and the bottom so it lined up towards the top of the pouch through which we slipped the belt.
For the tassels, we took a large piece of felt and cut it into strips to about a half inch of the other side and glued that to the inside of the front flap:

Once that was secured, we added a small square of Velcro to the flap and front of the pouch so it would stay closed.
The skirt:

We started with the "skirt" part. We cut 3 pieces of blue cotton fabric, one about 15 inches tall, one about 11 inches tall and one about 8 inches tall, all three about 42 inches wide. We put a small seam on each piece on the varied height edges. From there, we sewed a piece of lace to one 42 inch edge of each piece and then sewed each piece together - lace edges over bare edges, the smaller piece at the top, the largest at the bottom. Then we gathered the bare edge of the top (short piece) a bit.
Next we cut a strip of the blue fabric about 4 inches tall and 44 inches long, plus 2 additional pieces 4 inches tall and 13 inches long. The long piece was folded in half over the skirt, making sure the middle of each (skirt and tie) matched up and the edges folded under. This was then stitched closed, making sure no raw edges poked out.
The other two pieces were then folded in half and sewn similarly (so the edges were folded in and sewed shut). Then we sewed 2 straight lines right next to each other about a quarter of an inch away from the long edge all the way up. We did this again a quarter inch away from the last seam and so on until both strips were full. Then we cut between each pair of seams to about a quarter inch from the other end of the strip and sewed that end to each end of the cord:

This created a really nice fray that I was quite happy with.
Then all I had to do was water down some white paint and feather it up from the lace on each section of the skirt.
The shorts:
Are a pair of swimsuit bottoms in boyshort style that look like denim. There's not much more to say on that one...
The boots:
 |
| Pumpkin gives his seal of approval |
These are a wonderful pair of lace up, knee-high combat boots I found at Hot Topic back in high school. Back then I collected boots (still do a little bit) and I had to have these. They're a half size too small, unfortunately, but I still love them. I switched out the black laces they came with for white ribbon laces I bought at Joann's and the look was complete!

Aaaaaand the horrifying photos of high school Angi... ><


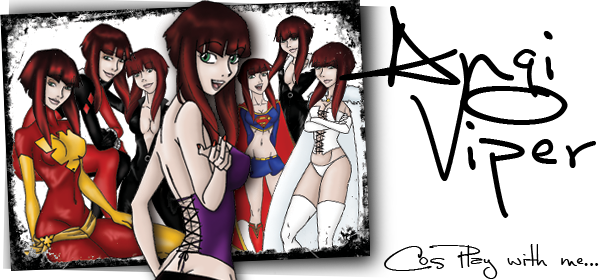
CosPlay with me
-Angi
I know this entry is old, but I wanted to say thanks for posting it! Your costume turned out amazingly and I never ever would've thought of using felt. I'm working on a Gunner!Paine right now and this entry helped a lot. <3
ReplyDelete